Finding tiny webs and speckled leaves on your beloved houseplants can be disheartening, often signaling the unwelcome presence of spider mites indoor plants. These minuscule pests can quickly turn lush foliage into a sad, stippled mess, but effective control is entirely within your reach. This comprehensive guide will walk you through identifying these common houseplant invaders, understanding their habits, and implementing proven strategies to get rid of spider mites and restore your plants to their vibrant health.
What to do first:
If you suspect spider mites, immediately isolate the affected plant to prevent spread. Then, physically wash the plant thoroughly with a gentle stream of lukewarm water, focusing on the undersides of leaves. This initial step can significantly reduce the population before you apply any treatments.
Quick Identification: Spotting Spider Mites on Indoor Plants
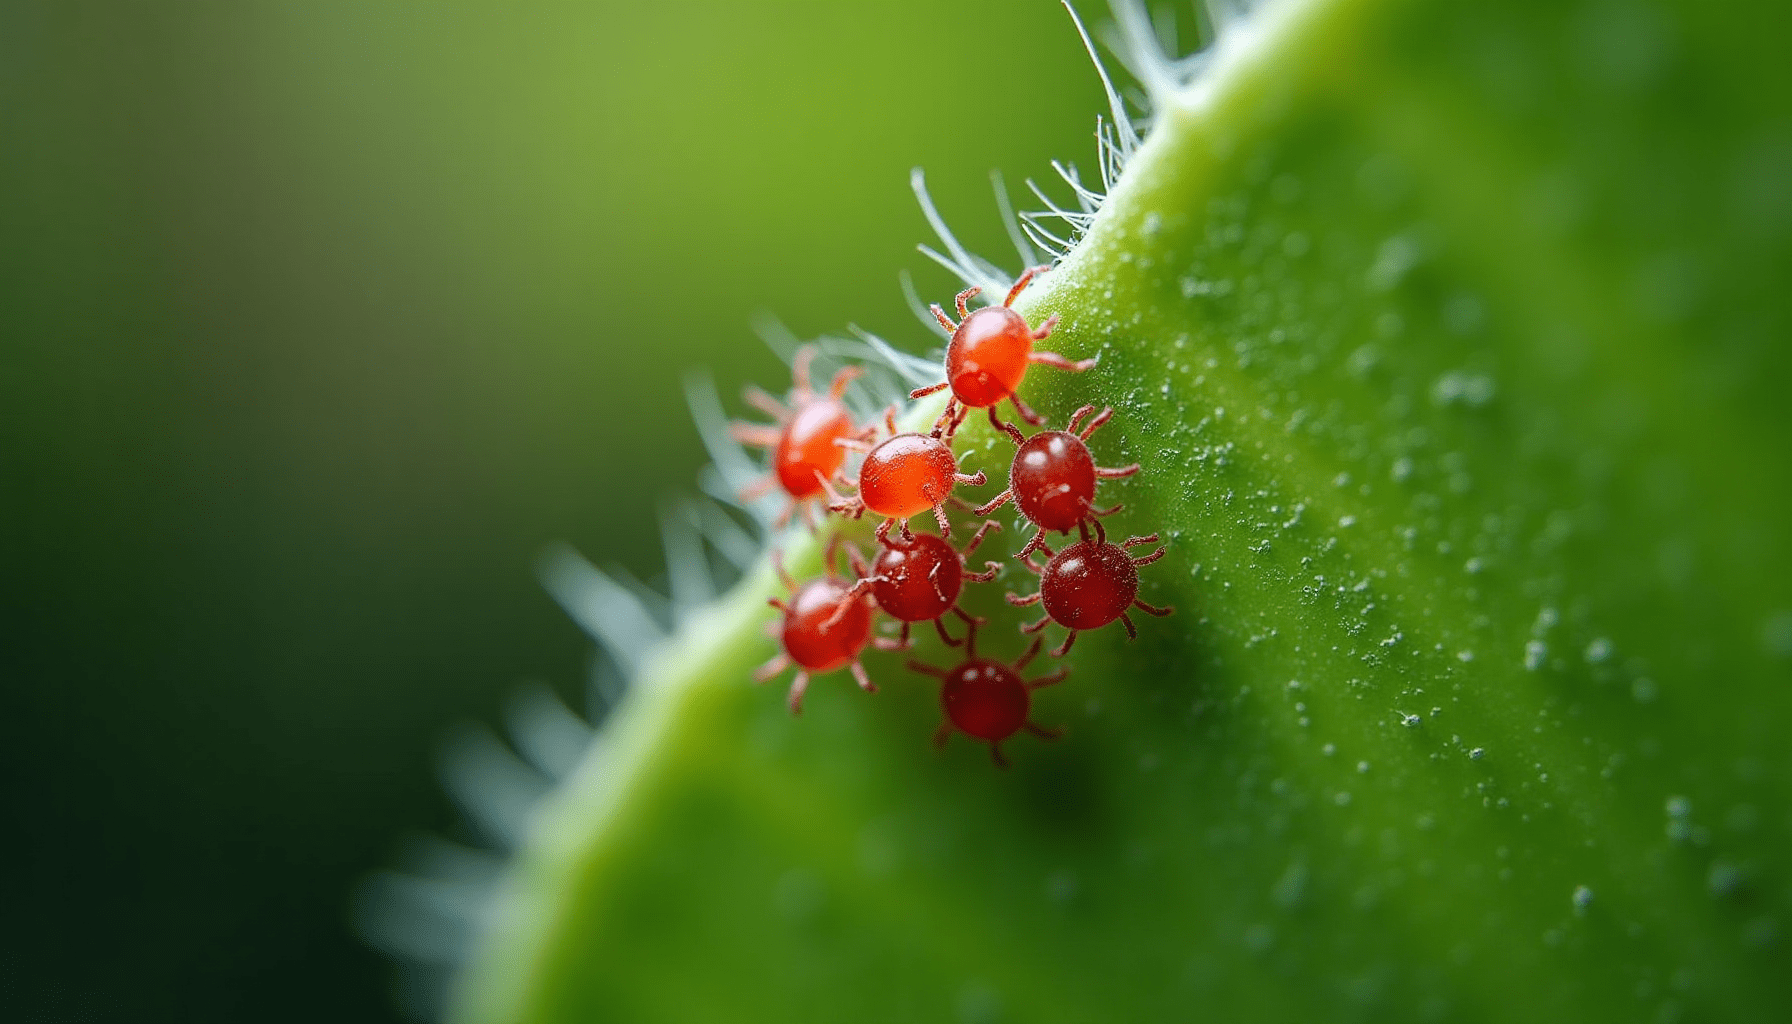
Spider mites are not insects but tiny arachnids, closely related to spiders and ticks. The most common culprit on houseplants is the two-spotted spider mite (Tetranychus urticae), barely visible to the naked eye. Recognizing them early is crucial for effective control.
Here’s how to identify spider mites:
- Size and Appearance: Adult spider mites are about 0.4–0.5 mm long, often reddish, yellowish, or greenish. You'll likely need a hand lens or the macro function on your phone camera to see them clearly. They look like tiny moving dots.
- Stippling: The first and most common sign is fine yellow or white speckling (stippling) on the upper surfaces of leaves. This damage occurs as mites pierce plant cells to feed, sucking out the chlorophyll.
- Webbing: In more advanced infestations, you'll see fine, silky webbing between leaves, at petiole joints, or on new growth. This webbing protects the mites and helps them move around the plant. Don't wait for webs; they indicate a well-established problem.
- Leaf Discoloration: Leaves may become dull, bronzed, or yellow, eventually drying out and falling off in heavy infestations.
- The Paper Test: Hold a white piece of paper under the foliage and gently tap or shake the plant. Tiny dark specks that fall onto the paper and then begin to move are likely spider mites.
These pests thrive in warm, dry conditions, making heated indoor environments in winter particularly susceptible. Regular inspection, especially of the undersides of leaves, is your best defense against a full-blown infestation.
Understanding Spider Mite Behavior and Damage
Spider mites have a rapid life cycle, which is why their populations can explode so quickly on spider mites indoor plants. At warm temperatures (around 80–90°F or 27–32°C), they can go from egg to adult in as little 7–10 days, according to the Missouri Botanical Garden. A single female can lay 50–100 or more eggs in her lifetime, often hidden on the undersides of leaves and within their protective webbing. This rapid reproduction means that an infestation can increase seventy-fold in just two weeks under ideal conditions.
Spider mites feed by piercing plant cells and extracting their contents, leading to the characteristic stippling. This damage reduces the plant's ability to photosynthesize, weakening it over time. Heavy feeding can cause leaves to yellow, bronze, and eventually drop off, leading to reduced growth and even plant death if left unchecked. The fine webbing they produce serves as both a protective barrier against predators and sprays, and a highway for them to travel across the plant.
Indoors, spider mites can reproduce year-round, unlike their outdoor counterparts who might experience a winter dormancy. They spread primarily by walking from plant to plant when foliage touches, or by human activity like handling plants and tools. Air currents can also carry them, making quarantine a critical first step in managing an infestation.
Effective Treatment Options for Indoor Plants
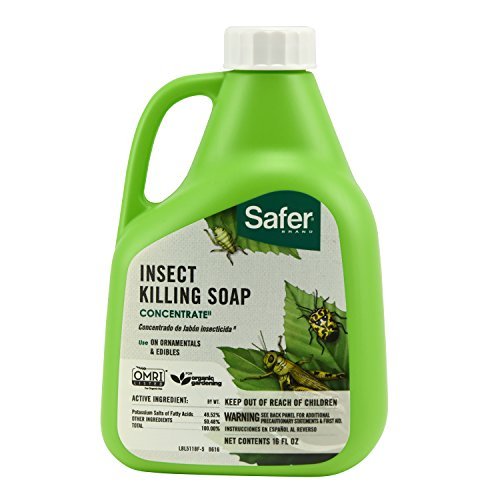
This insecticidal soap is a highly recommended, non-toxic, and effective first-line treatment for eradicating spider mites on indoor plants, directly addressing the article’s core problem.
- Effective contact control of aphids, whiteflies, spider mites, thrips, and other soft-bodied pests
- Easy to mix and use as a concentrate, with good value from a 16 oz bottle that makes multiple gallons
- OMRI Listed and suitable for organic gardening, with use allowed up to harvest
- Requires thorough coverage and repeat applications because it only works on contact
- Can cause plant stress or leaf damage if used improperly, especially on tender or drought-stressed plants

Neem oil is an organic and effective pesticide that targets spider mites, offering a safe and complementary treatment option for indoor plants, especially after understanding their rapid life cycle.
- Effectively controls common garden pests like aphids, whiteflies, and spider mites when used as directed
- Also works well as a fungicide for powdery mildew, black spot, and rust on roses, vegetables, and ornamentals
- Concentrated formula is economical and appreciated by users who like that it’s labeled for organic gardening and safe to use up to day of harvest
- Some users report leaf burn or plant stress if sprayed in hot sun, at too strong a mix, or too frequently
- Occasional complaints about the oily residue, neem odor, or the need for repeated applications to keep pests under control
Once you've confirmed the presence of spider mites, a multi-pronged approach is usually most effective. Start with physical removal and then move to targeted treatments.
Physical Removal: The First Line of Defense
Experts widely recommend starting with physical removal. This method is safe for your plants and significantly reduces mite numbers immediately.
- Shower the Plant: If your plant tolerates it and is small enough, take it to a sink or shower and rinse it thoroughly with lukewarm water. Focus on the undersides of leaves, where mites and eggs often hide. Use a gentle to moderate spray strong enough to dislodge the mites but not damage the leaves.
- Wipe Leaves: After rinsing, gently wipe the leaves with a damp cloth or paper towel. This helps remove any remaining webbing, eggs, and mites. Consider covering the soil surface with plastic wrap to prevent mites from being flushed into the potting mix.
This step alone can dramatically improve the effectiveness of any subsequent treatments.
Insecticidal Soaps
Insecticidal soaps are a popular and effective choice for indoor spider mite control due to their low toxicity. They work by disrupting the mites' protective outer layer, causing them to dehydrate.
- Application: Choose a product specifically labeled for houseplants and mites, always following the label directions. Test a small, inconspicuous area of the plant first and wait 24-48 hours to check for any adverse reactions (phytotoxicity).
- Thorough Coverage: Spray until leaves are thoroughly wetted, paying extra attention to the undersides and crevices. Direct contact with the mites is essential for the soap to work.
- Timing: Keep treated plants out of direct, hot sunlight to minimize the risk of leaf burn.
- Repetition: Due to their rapid life cycle, repeat treatments are crucial. Reapply every 3-7 days for several applications, as recommended by the product label or expert sources like The Sill.
Horticultural Oils (Including Neem Oil)
Horticultural oils, including those derived from neem, are another highly effective option. They work by suffocating mites and their eggs. Neem oil also offers additional benefits like repellent and anti-feedant properties.
- Product Selection: Use products specifically labeled for houseplants and mites.
- Application: Apply the oil at dusk or when the plant will be out of direct light for several hours to prevent leaf burn. Ensure thorough coverage of all plant surfaces, especially the undersides of leaves. Avoid letting excess oil run into the soil, as it can interfere with root respiration.
- Repetition: Repeat weekly for 3-4 weeks, or as directed by the product label, to target newly hatched mites.
DIY Remedies: Use with Caution
Many plant enthusiasts experiment with homemade sprays, but these come with caveats.
- Mild Soap & Water: A few drops of gentle liquid soap in a spray bottle can work similarly to insecticidal soap. However, commercial insecticidal soaps are formulated with specific surfactants and concentrations that are generally safer and more predictable for plants.
- Soap & Alcohol: Some mixtures include small amounts of isopropyl alcohol with soap and water.
- Hydrogen Peroxide: Diluted household 3% hydrogen peroxide is sometimes used for spraying foliage.
Crucial Cautions: DIY solutions can be too concentrated and burn sensitive plant foliage (e.g., ferns, calatheas, succulents). Always test on a small, hidden part of the plant first and wait 24-48 hours. Avoid mixing multiple strong ingredients without careful testing. Commercial formulations are generally safer and more reliable.
Conventional Miticides and Biological Control
For severe infestations or large collections, other options exist:
- Conventional Miticides: Products containing azadirachtin (from neem), or sometimes stronger chemicals like bifenthrin or cyfluthrin, are listed by some sources like the Missouri Botanical Garden. However, many indoor gardeners prefer to avoid these due to toxicity concerns and residual effects in living spaces. If used, ensure the product is labeled for indoor use and follow all safety precautions. Rotate products to prevent resistance, as spider mites are known for developing it.
- Beneficial Insects and Mites: For serious growers or large collections, introducing predatory mites (e.g., Phytoseiulus persimilis, Neoseiulus californicus), lady beetles, or green lacewings can be effective. These natural predators feed on spider mites. However, they require specific environmental conditions (humidity, temperature) to establish and may not thrive in typical household settings. Ladybugs, for example, are fascinating insects that can help control pests; you can learn more about What Do Ladybugs Eat? on our site.
Crafting Your Spider Mite Treatment Schedule
Consistency is key when dealing with spider mites due to their rapid life cycle. A single treatment is rarely enough to eradicate them.
Here’s a sample treatment schedule:
- Initial Wash & Treatment: After physically washing the plant, apply your chosen miticidal product (insecticidal soap, horticultural oil, neem oil) thoroughly.
- Repeat Applications:
- Option A (Intensive): Reapply every 3 days for 3 applications. This covers roughly one full mite life cycle, ensuring you target newly hatched mites.
- Option B (Weekly): Reapply weekly for 3-4 weeks, as suggested by Costa Farms.
- Heavy Infestations: For very severe cases, consider an intensive phase (every 3 days for 2 weeks) followed by a maintenance phase (every 1-2 weeks for another 2-3 treatments), combined with diligent inspection.
- Ongoing Monitoring: Continue to inspect the plant closely for several weeks after you stop seeing symptoms or live mites. Keep it quarantined for at least two full mite life cycles (roughly 2-3 weeks) to ensure the infestation is truly gone before returning it to your main collection.
Always refer to the specific product label for the most accurate and safe application frequency and duration.
Prevention and Environmental Control
Preventing spider mites is much easier than treating an established infestation. Focusing on environmental conditions and regular plant care can significantly reduce their presence on your spider mites indoor plants.
- Increase Humidity: Spider mites thrive in warm, dry conditions. Increasing humidity around your plants can deter them.
- Use a humidifier near plant clusters.
- Group plants together to create a micro-climate with slightly higher humidity.
- Lightly mist foliage in the morning or periodically use a fine spray of water on the leaves and surrounding air.
- Avoid Hot, Dry Air: Keep plants away from heating vents, radiators, or very sunny windows that lack humidity support. These spots create the ideal environment for mites.
- Regular Rinsing: Periodically shower or hose down your plants (if feasible) to physically remove dust and any early-stage pests. This also helps maintain leaf health.
- Inspect Regularly: Make weekly inspections a routine, especially checking the undersides of leaves on vulnerable plants. Early detection is key to preventing a full-blown infestation.
- Quarantine New Plants: Isolate any newly purchased or gifted plants for 2-3 weeks before introducing them to your main collection. This allows you to monitor for pests and address them before they spread. You can also consider incorporating Best Plants That Repel Insects Naturally into your collection to boost natural defenses.
Addressing Common Spider Mite Misconceptions
Dispelling common myths about spider mites can help you tackle infestations more effectively.
- "Spider mites only attack outdoor plants." This is false. Spider mites are very common indoor pests, particularly on popular houseplants like ficus, palms, dracaena, and ivy. Indoor conditions often mimic their preferred hot, dry habitat.
- "If I don’t see webs, it’s not spider mites." Webbing is usually a sign of a larger, established infestation. Early infestations might only show stippling and tiny moving dots long before any noticeable webbing appears. Always use magnification and the white-paper tap test for early detection.
- "One treatment will solve the problem." Due to their rapid life cycle, spider mite eggs often survive initial treatments. Effective control requires repeated applications at short intervals to break the life cycle.
- "Any bug spray will kill spider mites." Many general insect sprays are not effective against mites, which are arachnids. Look for products specifically labeled as "miticides" or for "spider mites."
- "More product or a stronger mix is better." Over-concentrated soaps, oils, alcohol, or DIY mixes can burn foliage, especially on sensitive houseplants. Always follow label directions and spot-test to avoid plant damage.
- "Dry air is good because it prevents mold, so it must be good for plants." While excessive humidity can cause issues, very dry air is exactly what spider mites prefer and can stress many tropical houseplants. The goal is balanced humidity with good airflow.
- "If the plant looks fine after treatment, the mites are gone." Existing mite damage (stippled or scarred leaves) may remain visible even after the pests are controlled. The true sign of success is no new damage and no live mites on close inspection over several weeks.

Conclusion
Dealing with spider mites indoor plants requires vigilance and a consistent approach, but it's a battle you can win. By understanding their life cycle, recognizing early signs of infestation, and implementing a combination of physical removal, targeted treatments like insecticidal soaps or horticultural oils, and preventive measures, you can protect your beloved houseplants. Remember, early detection and persistent treatment are your most powerful tools. With a little patience and the right strategies, your indoor plants will thrive, free from these tiny, unwelcome guests.
For more insights into managing common houseplant pests and maintaining a healthy indoor garden, explore our guides on Winter Pest Control: Bugs That Invade in Cold Weather and other pest management resources.
Recommended Products
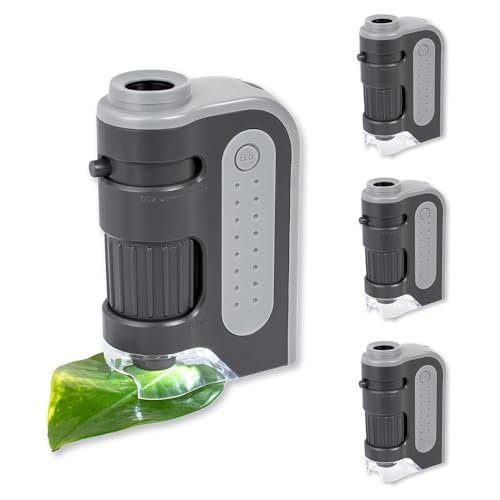
The article explicitly states that a hand lens or macro camera is needed to see spider mites clearly for identification. This pocket microscope provides the necessary magnification.
- Excellent magnification and image clarity for a very small, inexpensive pocket microscope (60x–120x with bright LED and aspheric lenses).
- Extremely compact, lightweight, and portable design that fits easily in a pocket and is convenient for kids, students, and hobby use on the go.
- Easy basic operation with simple focus/zoom controls and a single AA battery for the LED light, making it accessible for beginners and children.
- Very short focal distance at high magnification makes it hard to hold steady and requires placing the microscope directly on or very close to the subject.
- Limited to viewing mostly flat or thin objects and can be tricky for some users to position and focus, especially at 120x.
This sprayer is useful for the initial physical washing of plants mentioned in the article and for effectively applying liquid treatments like insecticidal soaps or neem oil concentrates.
- Easy to fill, clean, and use thanks to the funnel-top translucent tank and simple pump design.
- Good spray performance for lawn and garden tasks like fertilizer, herbicides, weed control, and pest control.
- Convenient reach and handling from the 34-inch hose and included wand/nozzle setup.
- Some reviewers say it does not hold pressure well and needs frequent re-pumping.
- A few users find it tiring to use for longer spraying sessions because pressure drops quickly.
As an Amazon Associate, I earn from qualifying purchases. Product recommendations are based on real reviews and independent research.