If you’re seeing perfectly round 1/2 inch holes in fascia boards or deck railings, you’re likely dealing with carpenter bees – and carpenter bee traps can help intercept females before they extend those tunnels deeper into your wood. The key is using the right trap style, installing enough traps, and placing them where bees actually scout for nest sites. This guide breaks down what works (and what doesn’t), how to place traps for best catch rates, and how to pair trapping with simple wood-protection steps so the problem doesn’t return next spring.
Quick Answer: Do carpenter bee traps work?
Yes – carpenter bee traps can reduce carpenter bee activity around high-value wood, especially when you place them near existing damage and install them early in spring.
Here’s the fastest way to get results:
- Confirm it’s carpenter bees: look for a shiny, mostly hairless black abdomen (bumble bees are fuzzy).
- Use the right entrance size: effective traps mimic a natural entry hole at about 1/2 inch (12-13 mm).
- Install early: hang traps late winter to early spring before peak nesting begins.
- Place where bees patrol: corners, eaves, roof peaks, and sun-exposed sides near active holes.
- Use enough traps: a common rule is 1 trap every 10-15 feet along susceptible fascia or rails.
- Don’t rely on traps alone: sealing and painting wood is what prevents repeat nesting long-term.
How to tell carpenter bees from look-alikes (before you trap)
Many “bee problems” around homes aren’t carpenter bees. Traps work best when you’re targeting the right insect, at the right time, for the right reason.
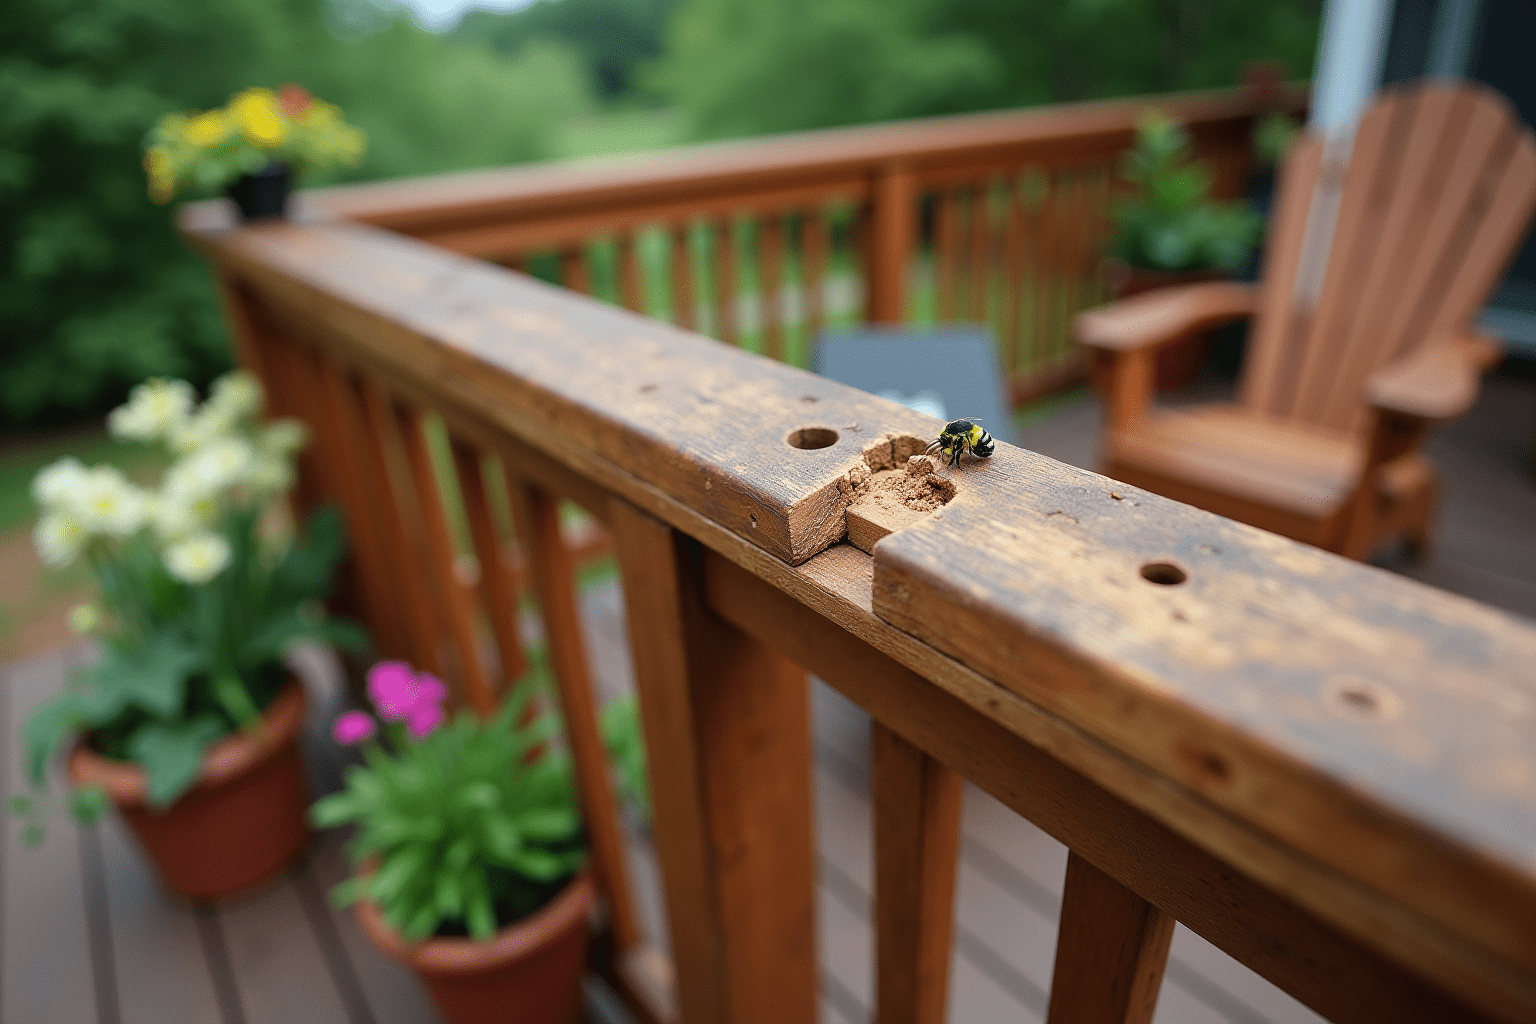
Carpenter bees that damage structures in North America are typically large carpenter bees in the genus Xylocopa (for example, the eastern carpenter bee Xylocopa virginica and western carpenter bee Xylocopa californica). According to the University of Florida IFAS Extension, females excavate nesting tunnels in wood to lay eggs, and those tunnels can be reused and expanded across seasons.
The “tell” is the entrance hole. Female carpenter bees create a nearly perfect circle that’s about 1/2 inch wide. Penn State Extension notes that a new gallery often starts several inches long, but tunnels can be extended and reused, eventually becoming much longer when activity repeats year after year.
Quick ID table (visual)
| Feature | Carpenter bee (Xylocopa) | Bumble bee (Bombus) |
|---|---|---|
| Abdomen | Shiny, mostly hairless, black | Fuzzy, hairy |
| Nest site | Tunnels in wood | Usually ground cavities or existing voids |
| Common sign | 1/2 inch round holes + sawdust | No round holes in wood |
| “Aggressive” hoverer | Often a male (cannot sting) | Workers may defend nest |
What you’re seeing around your house
- Hovering, darting “guard” bee near eaves: often a male carpenter bee. It looks intimidating but cannot sting.
- Sawdust piles under a hole: fresh excavation waste (often called frass).
- Woodpecker damage: woodpeckers may tear into boards to reach larvae, making the damage look worse than the bee hole alone.
Actionable takeaway: If the abdomen is shiny and you have 1/2 inch holes, traps are worth trying. If the abdomen is fuzzy, focus on bumble bee-friendly coexistence and avoid trapping.
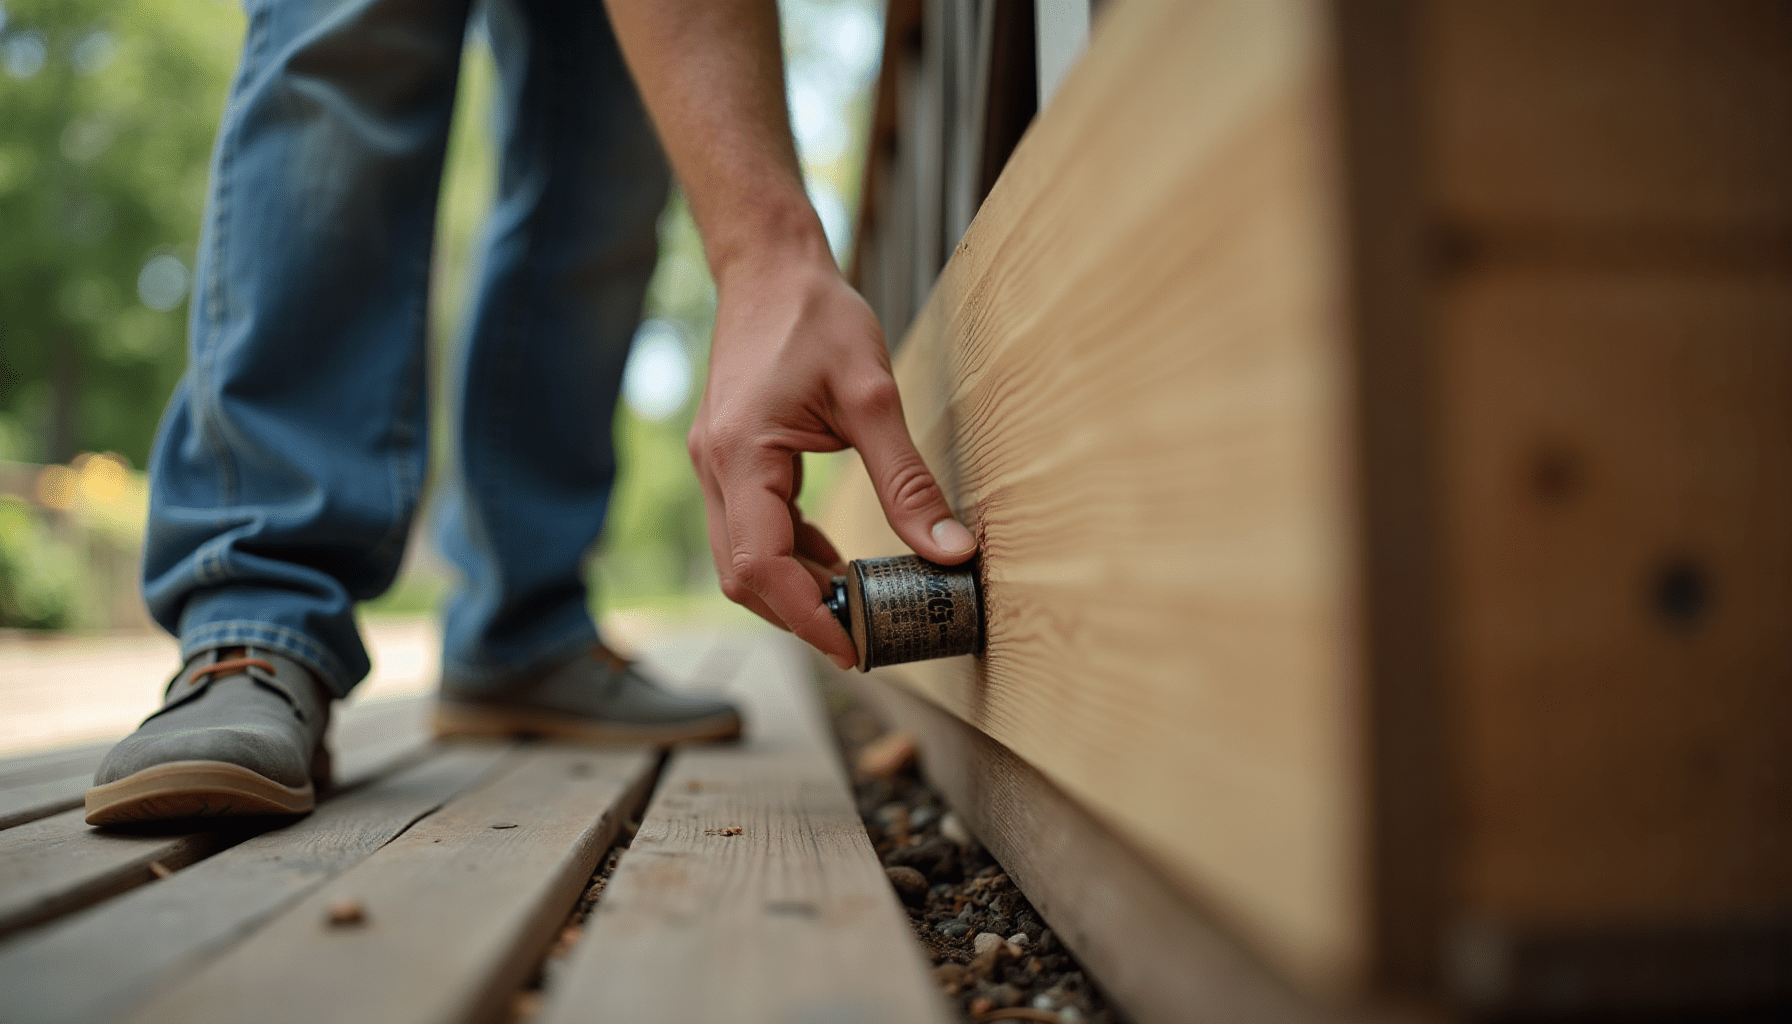
Carpenter bee traps: how they work and what designs catch the most bees
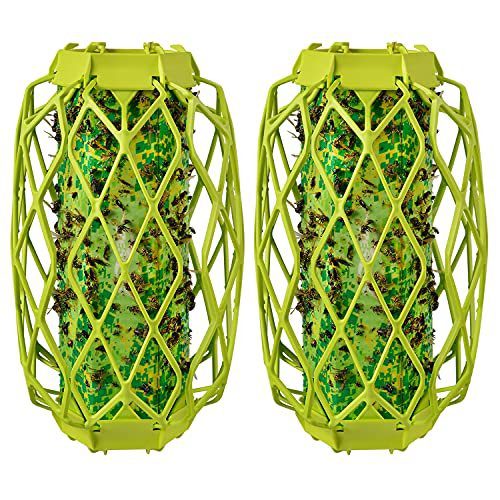
RESCUE! VisiLure® TrapStik for Wasps, Mud Daubers, Carpenter Bees – 2 Pack
This trap is specifically designed to catch carpenter bees, making it highly relevant for preventing wood damage as discussed in the article.
A carpenter bee trap is basically a “fake nesting site” that turns into a one-way maze. Instead of attracting bees with food, most traps exploit nesting behavior. Females are searching for the right tunnel shape, hole size, and wood feel. When they enter angled holes, they end up in a central cavity and then drop into a clear container they struggle to escape.
It helps to think of it like this: the trap isn’t baiting a hungry insect. It’s offering a tempting real-estate listing that ends in a dead-end.
The 3 main trap types (with a comparison chart)
| Trap type | What it is | Best for | Watch-outs |
|---|---|---|---|
| Wooden block trap (commercial) | Pre-built wood block with angled 1/2 inch holes + catch container | Fast setup, consistent build quality | Costs add up if you need many |
| DIY block trap | Homemade version using a 4×4 block + jar | Lowest cost, customizable | Hole angles and alignment matter |
| Lure-assisted trap | Any trap plus a scent lure | Jump-starting in low-activity areas | Placement still matters more than scent |
Commercial wooden block traps
These are the most common and usually the most reliable for homeowners who want “hang it and monitor it.” Many follow the same basic pattern you’ll see in products reviewed by consumer outlets and retailers. A good example of typical design and use is described in the Bob Vila carpenter bee trap guide.
DIY traps
DIY plans often mirror commercial engineering. A popular build uses a 4×4 block (around 10 inches long), a central bore, and angled side holes that meet the center chamber, with a mason jar screwed to the bottom. If you want a blueprint-style walkthrough, see the Instructables carpenter bee trap tutorial.
Lures and “bee bait”
Some brands sell scent lures intended for carpenter bees. These can help in the first week or two, especially if bees are present but not investigating the trap yet. Just keep expectations realistic. Extension guidance generally emphasizes wood condition, timing, and placement over scent alone.
Actionable takeaway: Choose a trap with angled 1/2 inch entry holes and a clear catch container. If you go DIY, measure carefully so holes actually meet the central cavity.
Where to place carpenter bee traps for the best results (timing, spacing, and height)
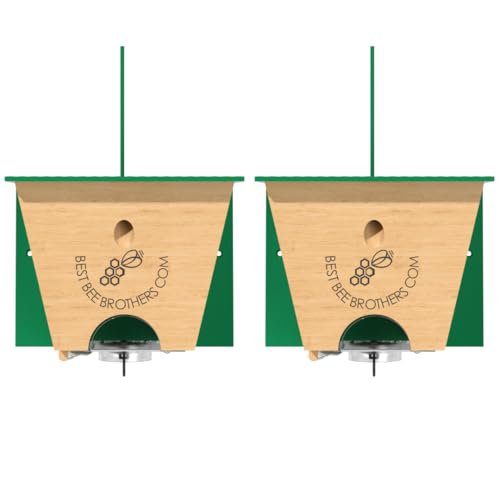
Best Bee Brothers Turbo Trap 2.0, Professional-Grade Carpenter Bee Trap for Outside with Bee Vault, Large Viewport & Spring-Loaded Door, 4.1” W x 4.8” H x 5.9” D (2 Pack)
This product includes multiple traps, which aligns with the article’s recommendation to use enough traps for effective control of carpenter bees.
Most trap “failures” are placement failures. Carpenter bees don’t wander randomly. They patrol edges, corners, and sun-warmed wood, often returning to the same areas year after year.
University extension guidance, along with consistent field advice from pest professionals, points to the same pattern: traps work best when they’re installed near active or historic nesting sites and combined with wood protection. The University of Florida IFAS Extension specifically emphasizes integrated prevention (sealing, painting, and repairs) as the most reliable long-term approach, with traps serving as a helpful add-on.
Placement checklist (visual step-by-step)
-
Find the hot spots
- Look for 1/2 inch holes, frass piles, and hovering bees.
- Mark boards with repeat activity (fascia, rails, pergolas, trim).
-
Pick sun-exposed sides
- South or southeast exposures often see more activity in temperate regions.
- Warm wood is attractive to scouting females.
-
Mount at the right height
- Aim for eave height or where bees are actively flying.
- Keep the trap visible and unobstructed.
-
Use corners, edges, and peaks
- Corners of eaves and roof peaks are common patrol routes.
- Mount traps within a few feet of existing holes when possible.
-
Install enough traps
- A common recommendation is 1 trap every 10-15 feet along vulnerable fascia or rails (a guideline echoed in many product instructions and consumer testing summaries).
-
Start early
- Put traps up late winter to early spring before peak nesting begins.
- Leave them up through spring and early summer, then reassess.
Should you leave dead bees in the collection jar?
Some manufacturers and experienced users report better attraction when the container is not perfectly clean. The idea is simple: dead bees provide visual cues and possibly odor cues that signal “this is a used nest site.” If you’re comfortable with it, leaving a small number inside can help. If you prefer cleanliness, you can still trap successfully – just pay extra attention to placement.
Actionable takeaway: Put traps where you already see activity, not where you wish the bees would go. If you install traps far from the problem boards, you’re asking the bees to change their habits.
Stop wood damage long-term: pair traps with repairs, sealing, and targeted control
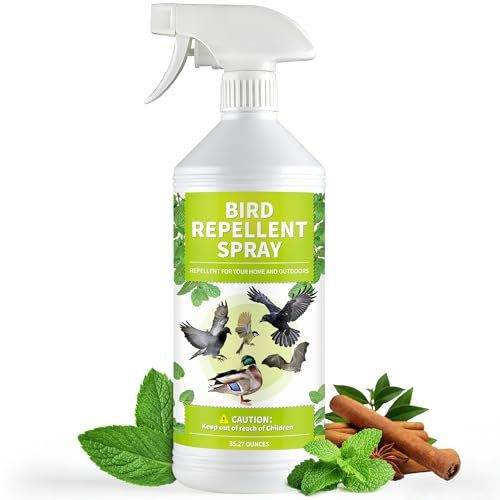
16 oz Bird Repellent Spray for Outdoor, Bat Repellent Spray, Woodpecker Deterrent, Pigeon Repellent for Fruit Tree Garden Farm Roof Railing Patio, Pack
This spray can help deter woodpeckers that are attracted to carpenter bee activity, thus providing additional protection for wooden structures.
Traps can reduce the number of females attempting to nest on your home. But they do not erase the scent marks, existing tunnels, or the appeal of bare wood. If you want the problem to fade year over year, you need to make your structure less inviting.
Clemson Cooperative Extension notes that carpenter bee activity can become costly when it persists across seasons and when woodpeckers enlarge galleries to reach larvae. That’s why prevention steps matter as much as capture.
Integrated plan (visual “do this, then that”)
During active season (spring to early summer)
- Hang traps near active holes and patrol zones.
- Avoid sealing holes that are occupied. Trapping bees in the wood can lead to more chewing as they attempt to escape.
- If you use any insecticide, keep it targeted to wood surfaces or galleries, and avoid treating flowering plants where pollinators forage.
After activity slows (late summer to fall in many regions)
-
Confirm galleries are inactive
- No fresh sawdust.
- No bees entering/exiting on warm days.
-
Treat and seal
- Some extension guides recommend treating galleries first, then sealing after a short wait period.
- Seal holes with wood dowels and exterior-grade wood glue, or exterior filler/caulk.
-
Sand and protect the surface
- Paint is generally more deterrent than stain alone.
- Seal exposed end-grain and weathered areas carefully.
-
Upgrade materials where practical
- Composite/PVC trim, aluminum wraps, and capped railings reduce nesting opportunities.
What about “natural” carpenter bee control?
If your goal is low-chemical control, traps plus maintenance is the best path. You can also reduce attraction by:
- Keeping wood painted or sealed
- Replacing heavily weathered boards
- Reducing exposed softwood surfaces where possible
If you need additional protection for other stinging insects around eaves, note that carpenter bee traps are not general wasp traps. For that, see our guide to Best Wasp Traps for Your Yard.
Actionable takeaway: The fastest improvement comes from traps. The lasting improvement comes from sealing and painting the wood they prefer.
Safety, ethics, and common mistakes (so you don’t create a bigger problem)
Carpenter bees sit in an awkward category. They can damage wood over time, but they’re also important pollinators in many ecosystems and crops. The UC IPM Program highlights their role as pollinators, which is a good reminder to keep control targeted to structures that truly need protection.
Safety basics around carpenter bees
- Males cannot sting, even if they buzz your face.
- Females can sting, but usually only when handled or trapped.
- Wear gloves and eye protection when working near active nest sites, especially under eaves.
If you’re doing ladder work, protective clothing matters more than bravado. For gear options and what actually helps, our buyer’s guide on Best Bee Suits and Protective Gear breaks down practical choices.
Common mistakes to avoid (quick list)
-
Mistake: Using one trap for an entire house.
Carpenter bees may be active along long stretches of fascia. Use enough traps for coverage. -
Mistake: Hanging traps in shade, behind plants, or too far from activity.
Traps need to be in the patrol path. -
Mistake: Relying on sugar water or honey bait.
Carpenter bee traps work mainly by nesting-site mimicry, not food attraction. Sugary liquids can attract other insects you do not want. -
Mistake: Sealing holes while bees are inside.
This can trap bees in the wood and lead to more chewing and surprise exits. -
Mistake: Treating everything with broad sprays.
That increases pollinator risk without fixing the core issue – exposed, attractive wood.
When to call a professional
Consider professional help if:
- You have multi-year activity with many holes across multiple sides of the structure.
- Woodpeckers are actively tearing into boards.
- Nesting is high up or unsafe to access.
- You suspect other pests are involved (termites, ants, beetles).
If the damage looks like “carpenter pests” in general, it’s worth ruling out ants as well. See Best Carpenter Ant Treatments and Baits for how ant activity differs and what control looks like.
Actionable takeaway: Target control to the structure, not the whole yard. You’ll protect your home while keeping pollinator impact lower.
Conclusion: The best way to use carpenter bee traps (and actually keep bees out of your wood)
Carpenter bee traps work best when they’re installed early, placed near real activity, and used in adequate numbers along vulnerable wood. They can reduce local nesting pressure, but they won’t “solve” the problem if old galleries stay open and bare wood stays exposed.
Next step: walk your home’s sunny sides and eaves, mark active holes, then hang traps at corners and peaks with roughly one trap every 10-15 feet. When the season winds down, seal old holes and paint or seal the wood to prevent repeat nesting.
For related pest situations around roofs and eaves, compare strategies in our Best Wasp Traps for Your Yard. If you’re building a safer toolkit for working around stinging insects, our guide to Best Bee Smokers for Beekeeping can help you understand when smoke is useful and when it isn’t.
As an Amazon Associate, I earn from qualifying purchases. Product recommendations are based on real reviews and independent research.